Ender 5 + Klipper + Mainsail
Upgrading and Ender 5 3D Printer with Klipper.
Hardware
This is the very first version of Creality Ender 5 that has been built. The mainboard comes with an old 8 bit AVR ATmega1284p. So there is not much processing power available, but it should be enough. Official Ender 5 (2019) Manual.
The Printer has been upgraded with a BL-Touch and therefore has no end-stop on the Z-Axis anymore (had to re-use that pin for the BL-Touch probe).
I have tried with RasPI 3B that had 1 GB of RAM. They were OK platforms to be used with OctoPrint in the past. However using Mainsail, it showed that 1GB of RAM might not be enough. Since I have no other RasPi 3 with more RAM i therefore switched to a RasPi 4 with 4 GB of RAM.
Flashing the image
Flash an SD Card, Mainsail shipts with the official «Raspberri Pi Imager».
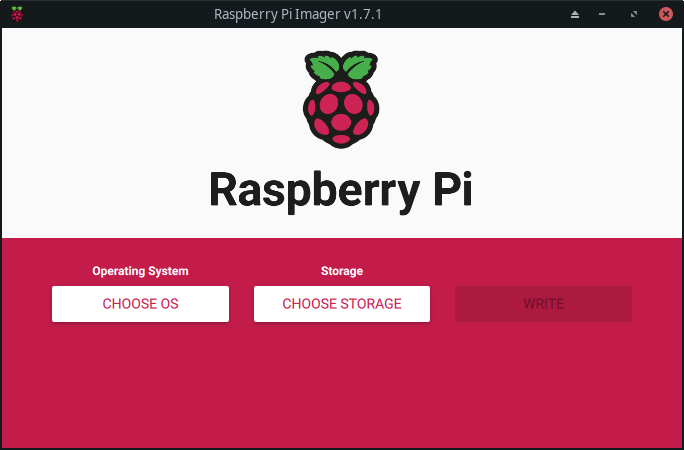
Raspberry Pi Imager

“Other specific-purpose OS”
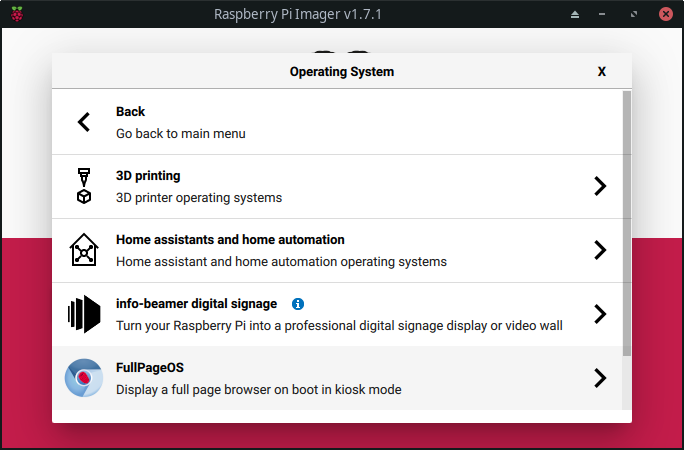
“3D printing”
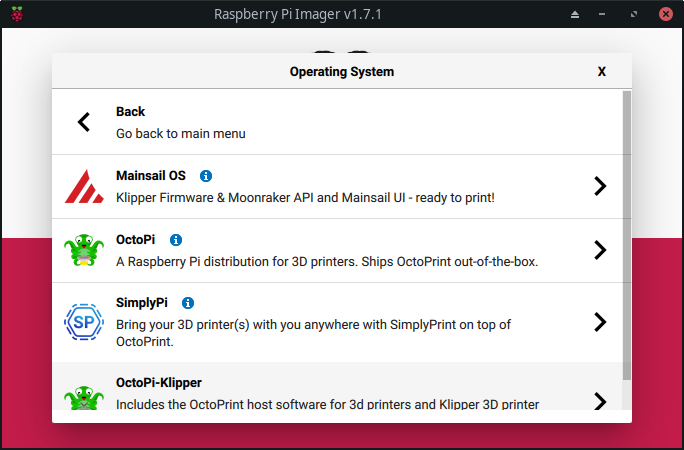
OS type
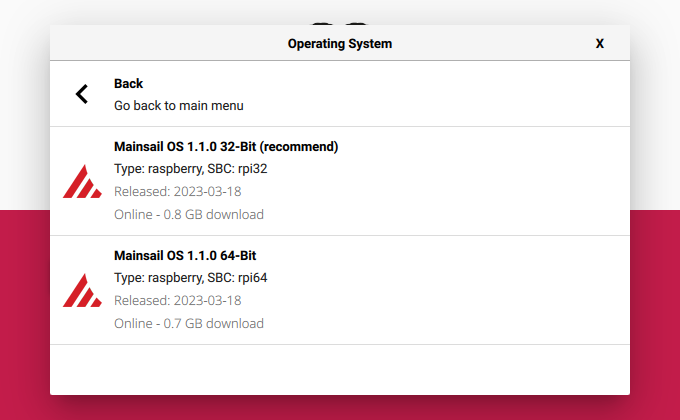
“Mainsail OS”
printer.cfg
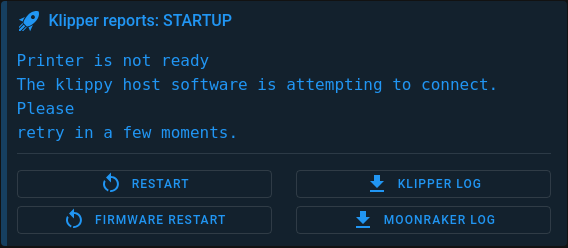
After first boot, point the browser to the your Raspberry PI’s host name or ip. I was first greeted with this error message:
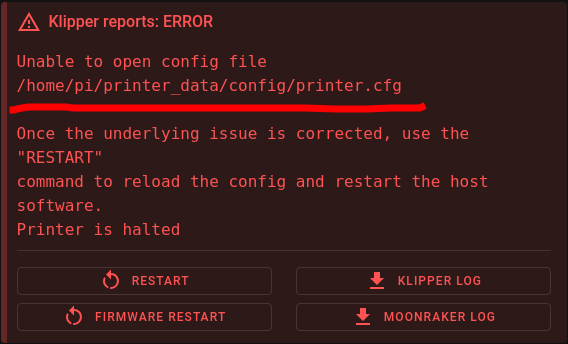
After some googling, I came up with the following printer.cfg which I derived from the (official example)[assets/printer-creality-ender5-2019.cfg]. Navigate to «Machine», select «config» as Root and upload the print.cfg file to that folder. Restart the server.
Now would be a good time to update all packages. There is a software widget on the dashboard:
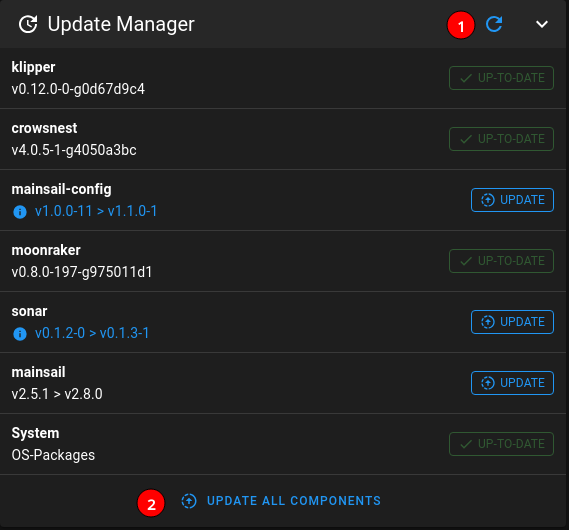
Reboot the system for good measure.
Compile Firmware
Board
we have to compile the firmware for the creality board which uses an ATMega1284p MCU:
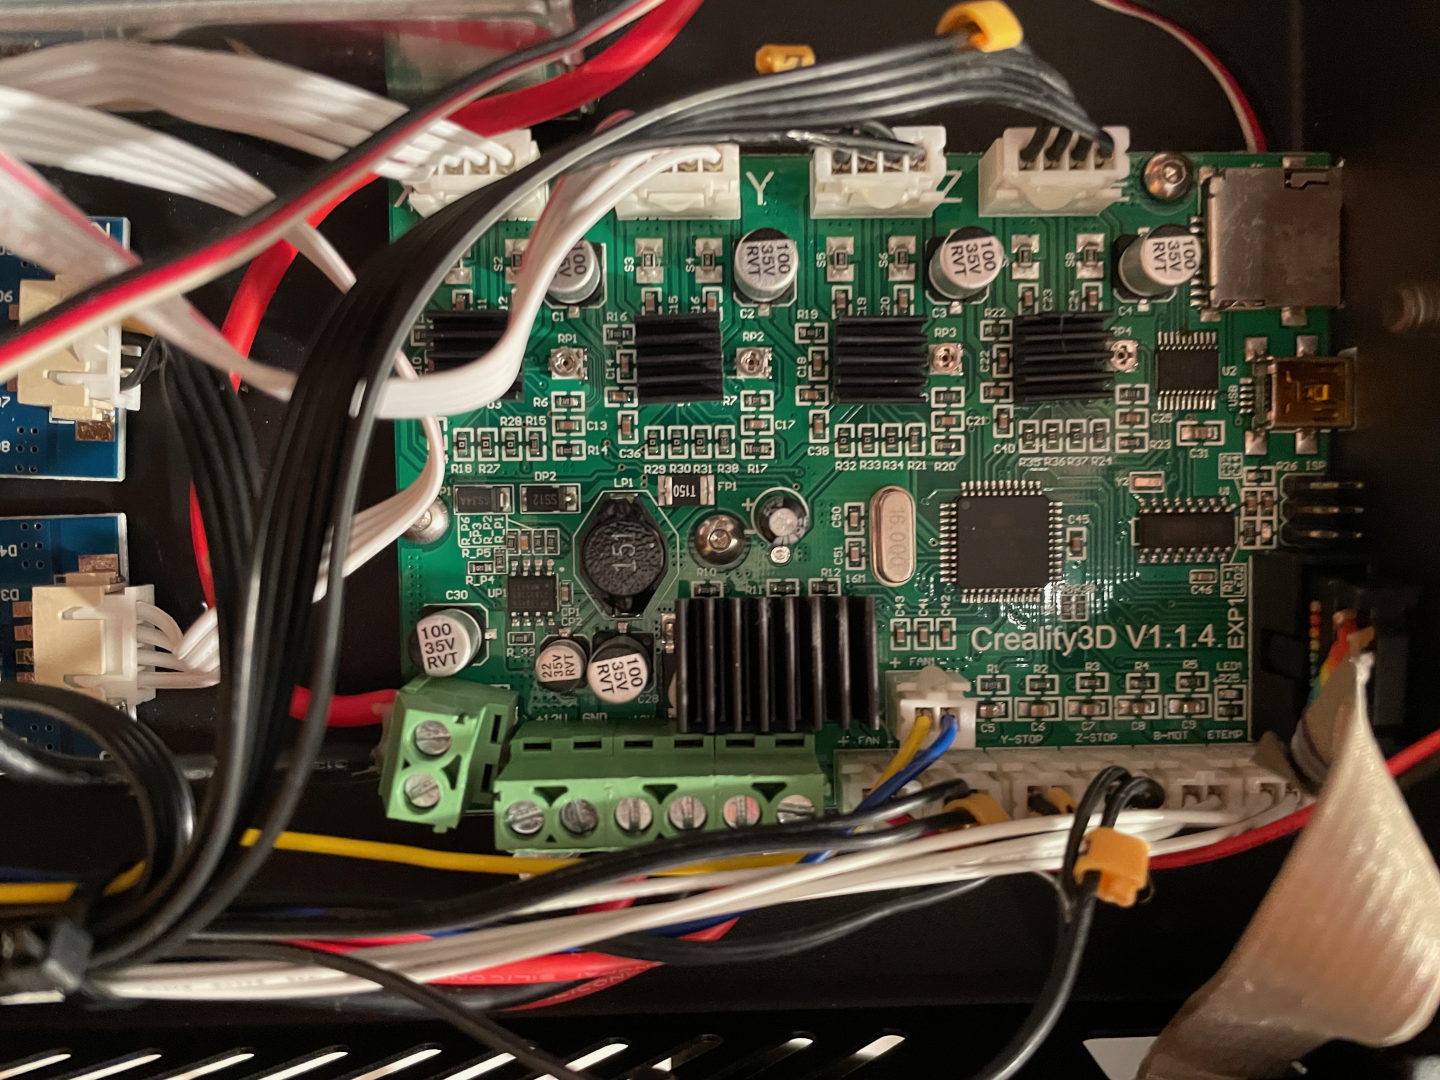
Picture of my board
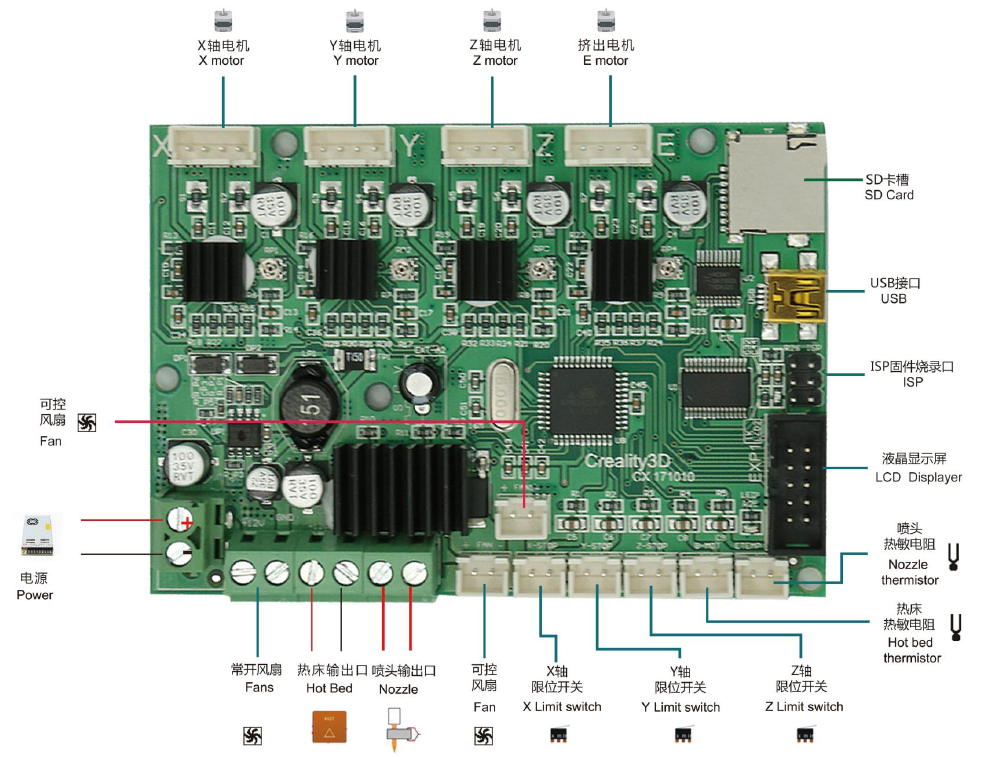
From the official Manual
These board connections apply to the V1.1.2/V1.1.3/V1.1.4 Creality board versions.
Configure
cd into ~/klipper and run make menuconfig. Select these options:
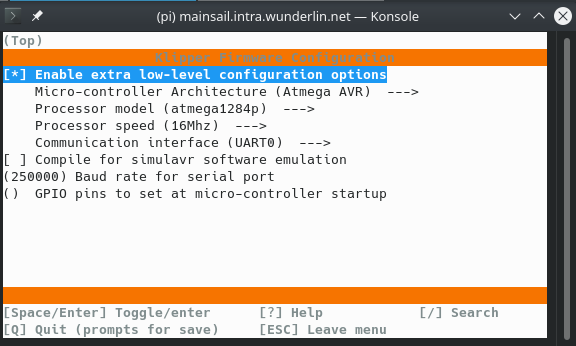
Save and exit.
Compile
Run make and watch for errors. When make was successfull, you should see something like this:
1...
2  Compiling out/src/avr/watchdog.o
3  Compiling out/src/avr/serial.o
4  Compiling out/src/generic/serial_irq.o
5  Building out/compile_time_request.o
6Version: v0.12.0-0-g0d67d9c4
7  Linking out/klipper.elf
8  Creating hex file out/klipper.elf.hex
Upload firmware to MCU
Find the serial port, it is needed to upload the firmware:
1pi@mainsail:~/klipper $ ls /dev/serial/by-id/*
2/dev/serial/by-id/usb-1a86_USB2.0-Serial-if00-port0
Stop klipper and upload
1sudo service klipper stop
2make flash FLASH_DEVICE=/dev/serial/by-id/usb-1a86_USB2.0-Serial-if00-port0
3sudo service klipper start
Output of avrdude should look something like this:
 1  Flashing out/klipper.elf.hex to /dev/serial/by-id/usb-1a86_USB2.0-Serial-if00-port0 via avrdude
 2
 3avrdude: AVR device initialized and ready to accept instructions
 4
 5Reading | ################################################## | 100% 0.00s
 6
 7avrdude: Device signature = 0x1e9705 (probably m1284p)
 8avrdude: reading input file "out/klipper.elf.hex"
 9avrdude: writing flash (32192 bytes):
10
11Writing | ################################################## | 100% 4.03s
12
13avrdude: 32192 bytes of flash written
14avrdude: verifying flash memory against out/klipper.elf.hex:
15avrdude: load data flash data from input file out/klipper.elf.hex:
16avrdude: input file out/klipper.elf.hex contains 32192 bytes
17avrdude: reading on-chip flash data:
18
19Reading | ################################################## | 100% 3.44s
20
21avrdude: verifying ...
22avrdude: 32192 bytes of flash verified
23
24avrdude: safemode: Fuses OK (E:00, H:00, L:00)
25
26avrdude done.  Thank you.
Connect to the Printer
With this done, the config error message goes away and we are greeted with an information that the printer is not ready:
First of all, connect the usb port of the printer to the RasPI and power up the printer.
Configure BL-Touch
Official BL-Touch Klipper documentation.
Send the following commands
BLTOUCH_DEBUG COMMAND=pin_down
BLTOUCH_DEBUG COMMAND=touch_mode
QUERY_PROBE
BL-Touch should extend and light should go off and the console should print “probe: open”. When pushing against the probe and sending QUERY_PROBE the console should read: “probe: TRIGGERED”.
When ok, then reset the probe with BLTOUCH_DEBUG COMMAND=pin_up
Time to test homing. Be ready to shut down the printer quickly. Move the bed manually down. Then send the homing command with
G28 should make the z-axis home. lift the BL_Touch probe with your finger nail (gentle) and the z-axis should stop. If not power down the printer quickly.
Fixing the BL-Touch that isn’t complaint
NOTE: My cheap BL-Touch knockoff had problems reporting the state even though QUERY_PROBE was working, klipper kept reporting “BLTouch failed to raise probe” when Homing the Z axis (G28). I had to add the following line to the config file:
1[bltouch]
2# NOTE: this is dangerous to be used on genuine BL-Touch probes
3#
4#       my bltouch reports QUERY_PROBE properly, but it fails
5#       see: https://www.klipper3d.org/BLTouch.html#bl-touch-clones
6pin_up_touch_mode_reports_triggered: false
My Probe was from Trianglelab 3D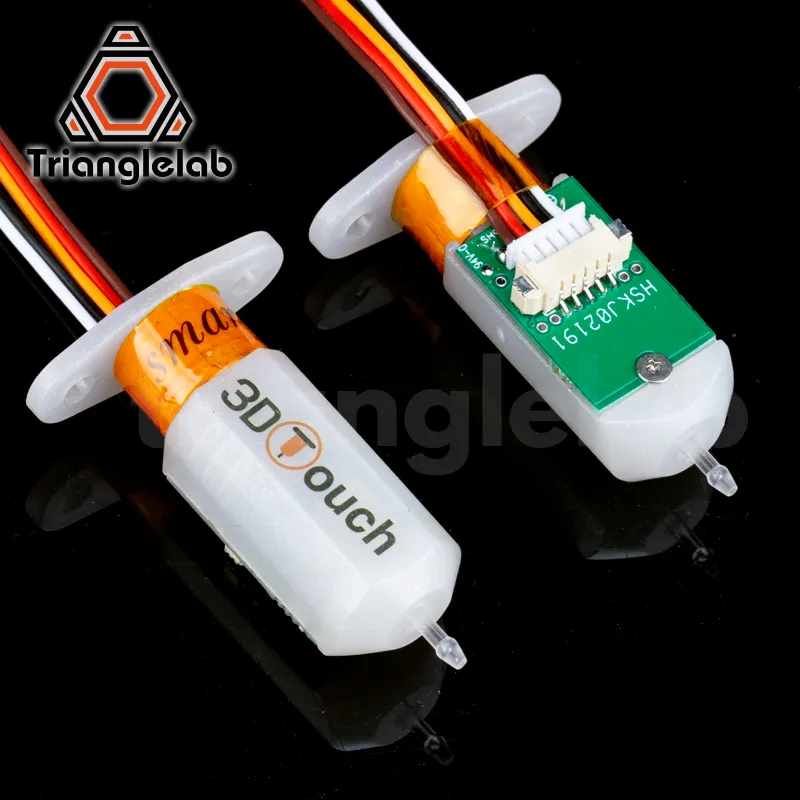
Trianglelab 3D Touch Automatic Leveling Sensors
Probe calibration
Now that we know all end stops are working we can move on the probe calibration.
Probe Offset Calibration
X / Y Axis
Because the probe is not directly beneathe the nozzle, and these installations are usually custom, we need to tell klipepr the X and Y offset between the nozzle and the BL-Touch tip.
Home into a fairly center place and note down the head position:
GET_POSITION

07:26 mcu: stepper_x:2111 stepper_y:2351 stepper_z:-3890
      stepper: stepper_x:124.000000 stepper_y:127.000000 stepper_z:0.300000
      kinematic: X:124.000000 Y:127.000000 Z:0.300000
      …
So my X is 124 and my initial Y is 127. Use some tape to mark the nozzles position on the bed. Move the head around until the tip of the BL-Touch probe is exactly over the mark. Repeate the measurement:
GET_POSITION

07:30 mcu: stepper_x:5391 stepper_y:3391 stepper_z:-3890
      stepper: stepper_x:165.000000 stepper_y:140.000000 stepper_z:0.300000
      kinematic: X:165.000000 Y:140.000000 Z:0.300000
      …
So the offset is X: 124 - 165 = -41 and Y: 127 - 140 = -13. Let’s update the printer.cfg file:
1[bltouch]
2…
3x_offset: -41.0
4y_offset: -13.0
5…
Issue a RESTART command so that the new values take effect.
Benchy Time!
Video printing @ 250 m/s
CE5_3DBenchy.3mf, CE5_3DBenchy.gcode.
The result
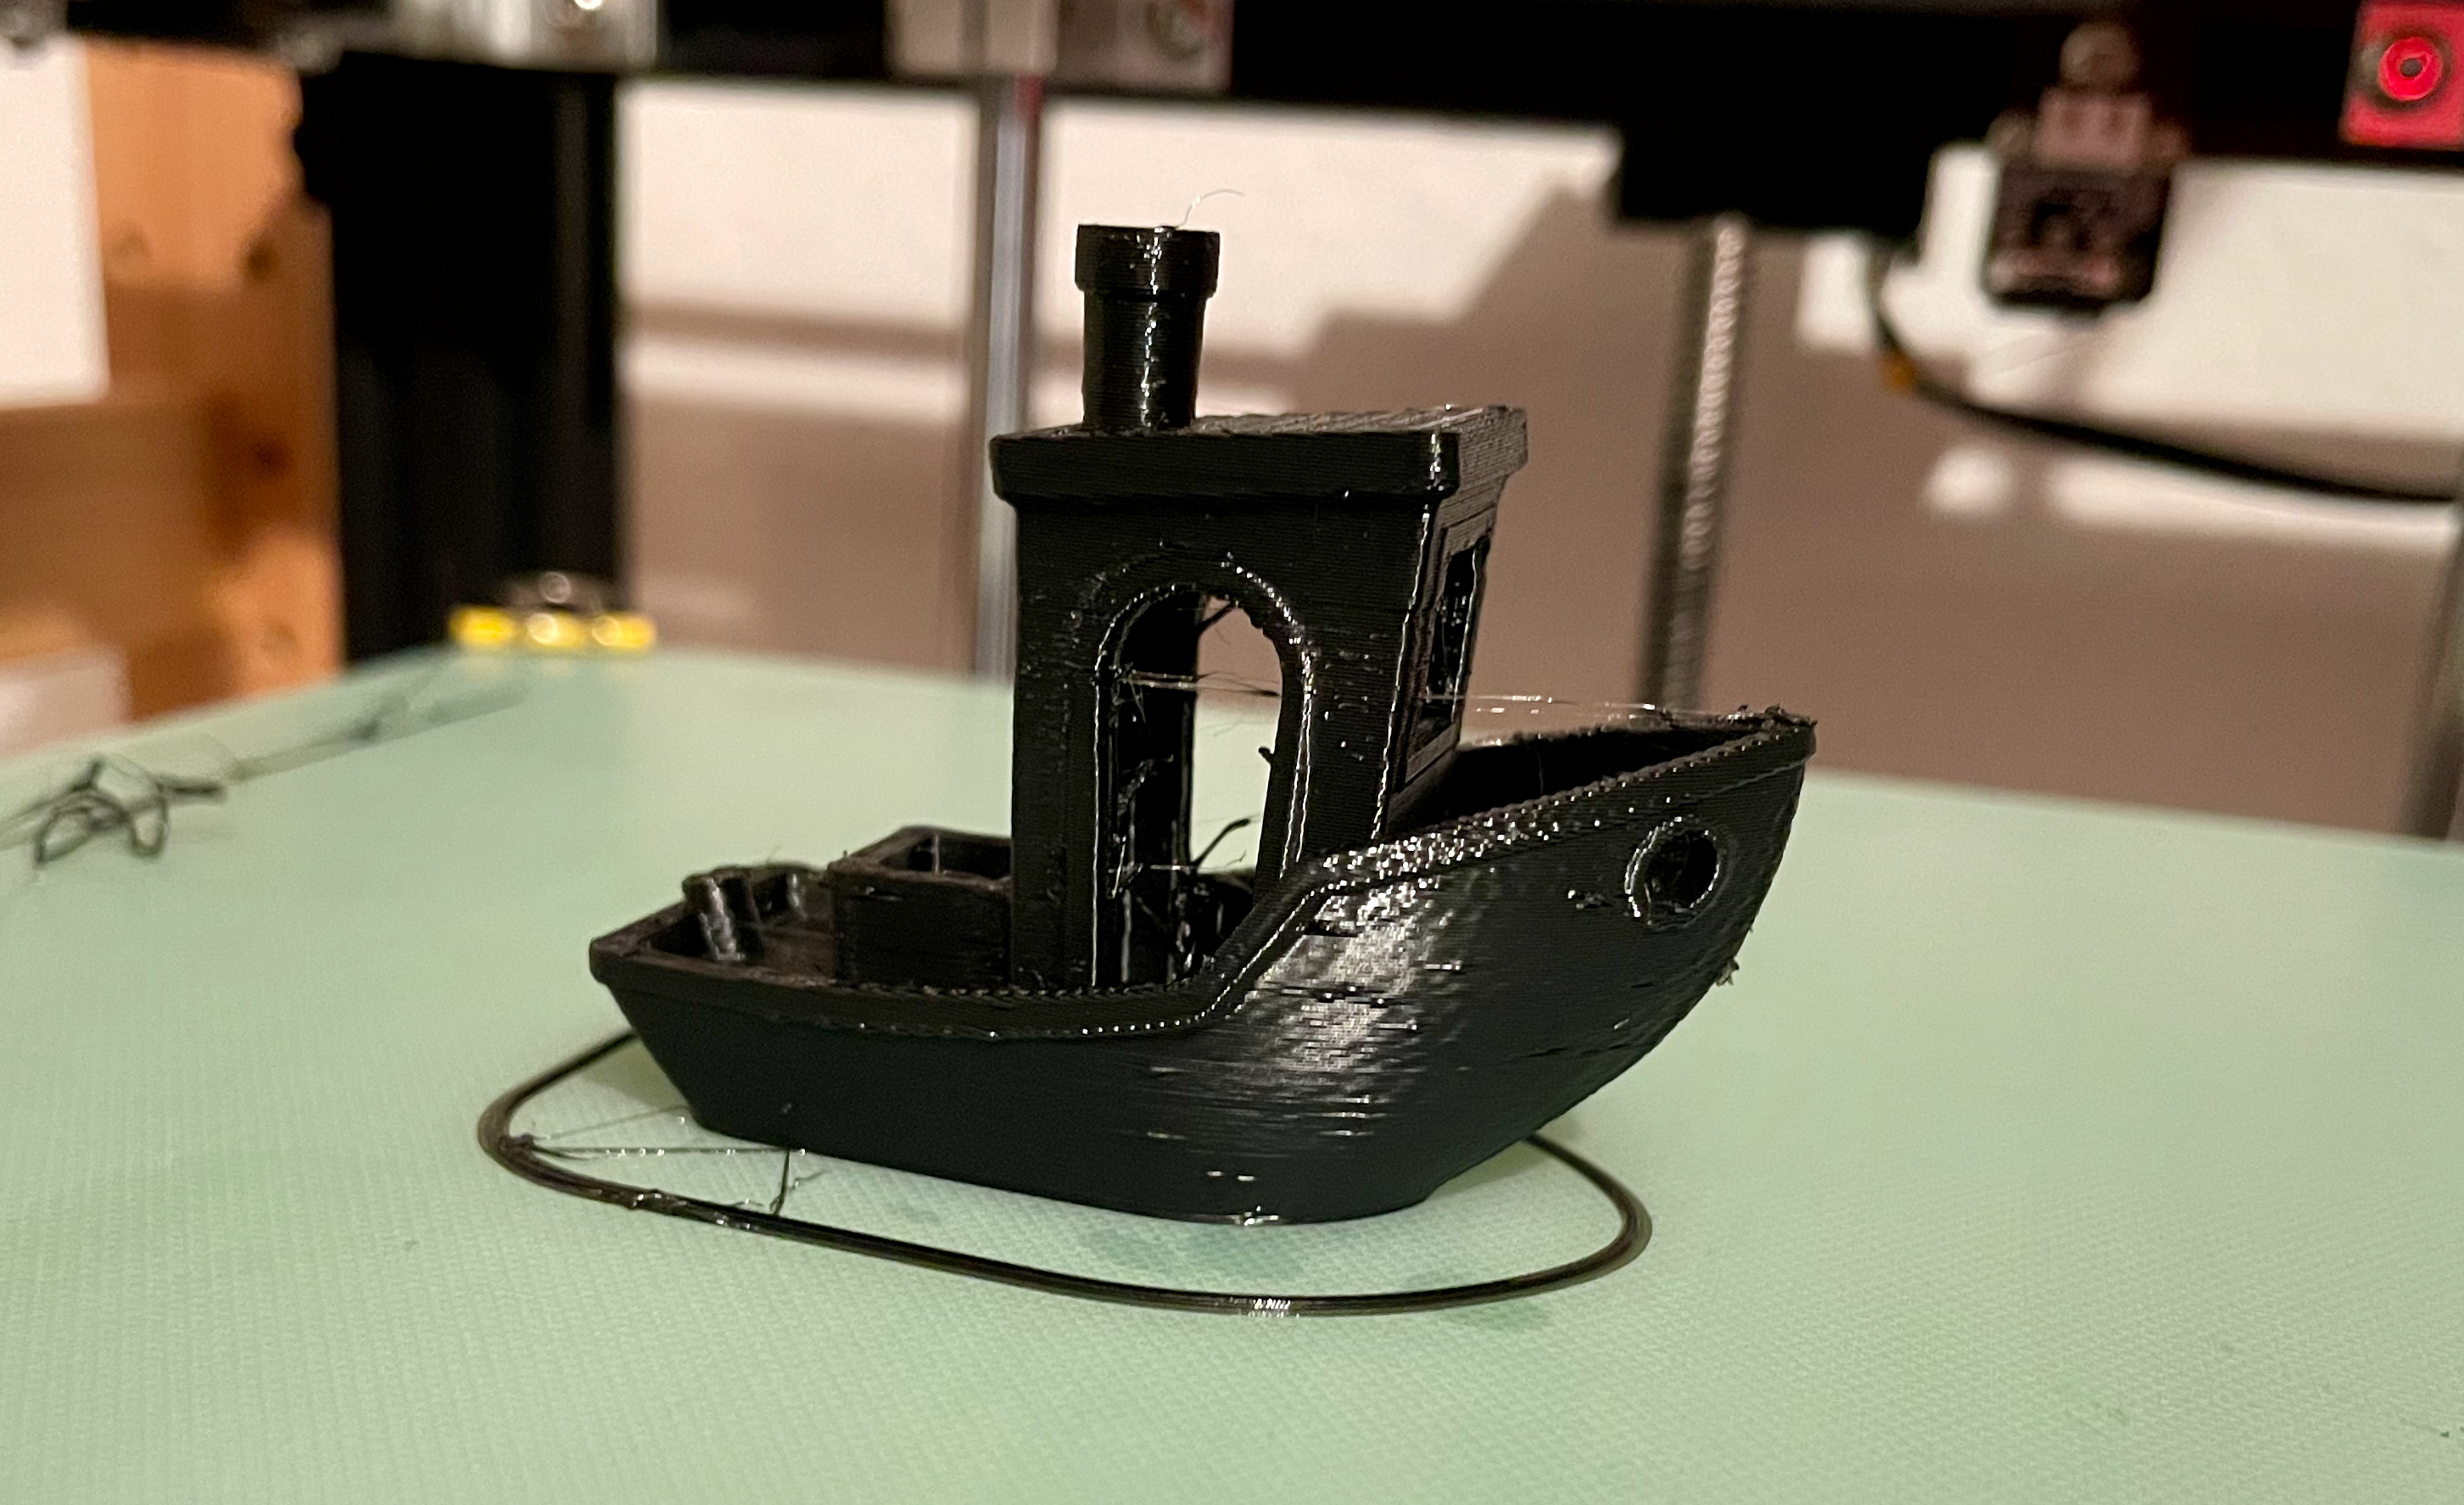
A benchy, not very clean but it printed at 250 m/s
It is not the best. However, the printer has not yet been tuned. My old 8bit board are having some diode filters installed (might have to disconenct them for clipper).
The shelf my printer is sitting on is currently shaking quiet hard. So before any tuning will be done I need to go down to the hardware store and find something to bolt the shelf properly to the wall.