Does it ring a bell 🔔 ?

Here is a collection of things that improve printing with clipper when using Cura 5.5. This is the 2nd installment of a series of articles documenting my journey in “upgrading” an old (2019) Creality Ender 5 with Klipper.
The current problem while printing is, that I get a lot of ringing. Let’s find out what causes it.
The printer has a few hardware modifications installed:
- BL-Touch
- TL Smoother (Diode filter for motor drivers)
- Bed Support (to stiffen the Bed)
- Polypropylene Build Plate
- Metal Extruder Kit
Printer Setup
These are the settings currently being used for printing. This is mostly stock Cura settings for Ender 5.
Ender 5 Startup G-Code
M220 S100 ;Reset Feedrate
M221 S100 ;Reset Flowrate

; make sure bed is at 60 degrees, then level
SET_HEATER_TEMPERATURE HEATER=extruder TARGET={material_print_temperature_layer_0}
SET_HEATER_TEMPERATURE HEATER=heater_bed TARGET={material_bed_temperature_layer_0}
G28 ;Home

; calibrate bed
M190 S{material_bed_temperature_layer_0}
BED_MESH_CALIBRATE

; clean extruder
G92 E0 ;Reset Extruder
G1 Z2.0 F3000 ;Move Z Axis up
G1 X10.1 Y20 Z0.28 F5000.0 ;Move to start position
G1 X10.1 Y200.0 Z0.28 F1500.0 E15 ;Draw the first line
G1 X10.4 Y200.0 Z0.28 F5000.0 ;Move to side a little
G1 X10.4 Y20 Z0.28 F1500.0 E30 ;Draw the second line
G92 E0 ;Reset Extruder
G1 Z2.0 F3000 ;Move Z Axis up

; start printing
START_PRINT BED_TEMP={material_bed_temperature_layer_0} EXTRUDER_TEMP={material_print_temperature_layer_0}
Some basic settings for the printer: ender5_klipper_petg.curaprofile.
Base settings (PETG)
 1[general]
 2version = 4
 3name = Standard Quality Ender5 Klipper
 4definition = creality_base
 5
 6[metadata]
 7type = quality_changes
 8quality_type = standard
 9intent_category = default
10position = 0
11setting_version = 22
12
13[values]
14cool_fan_speed = 100
15material_print_temperature = 235.0
16speed_print = 250
Ender 5 Settings (PETG)
 1[general]
 2version = 4
 3name = Standard Quality Ender5 Klipper
 4definition = creality_base
 5
 6[metadata]
 7type = quality_changes
 8quality_type = standard
 9setting_version = 22
10
11[values]
12klipper_accel_limit = 8000
13klipper_accel_to_decel_limit = 1500
14klipper_corner_velocity_limit = 5
15klipper_velocity_limit = 300
16klipper_velocity_limits_enable = True
17material_bed_temperature = 100
Base line prints with PETG XYZ Cudeb
1. Stock
The result is not bad, but there is some ringing. This might be due to the TL Smoothers or because the shelf, the printer resides on, just isn’t solid enough (wiggles slightly).
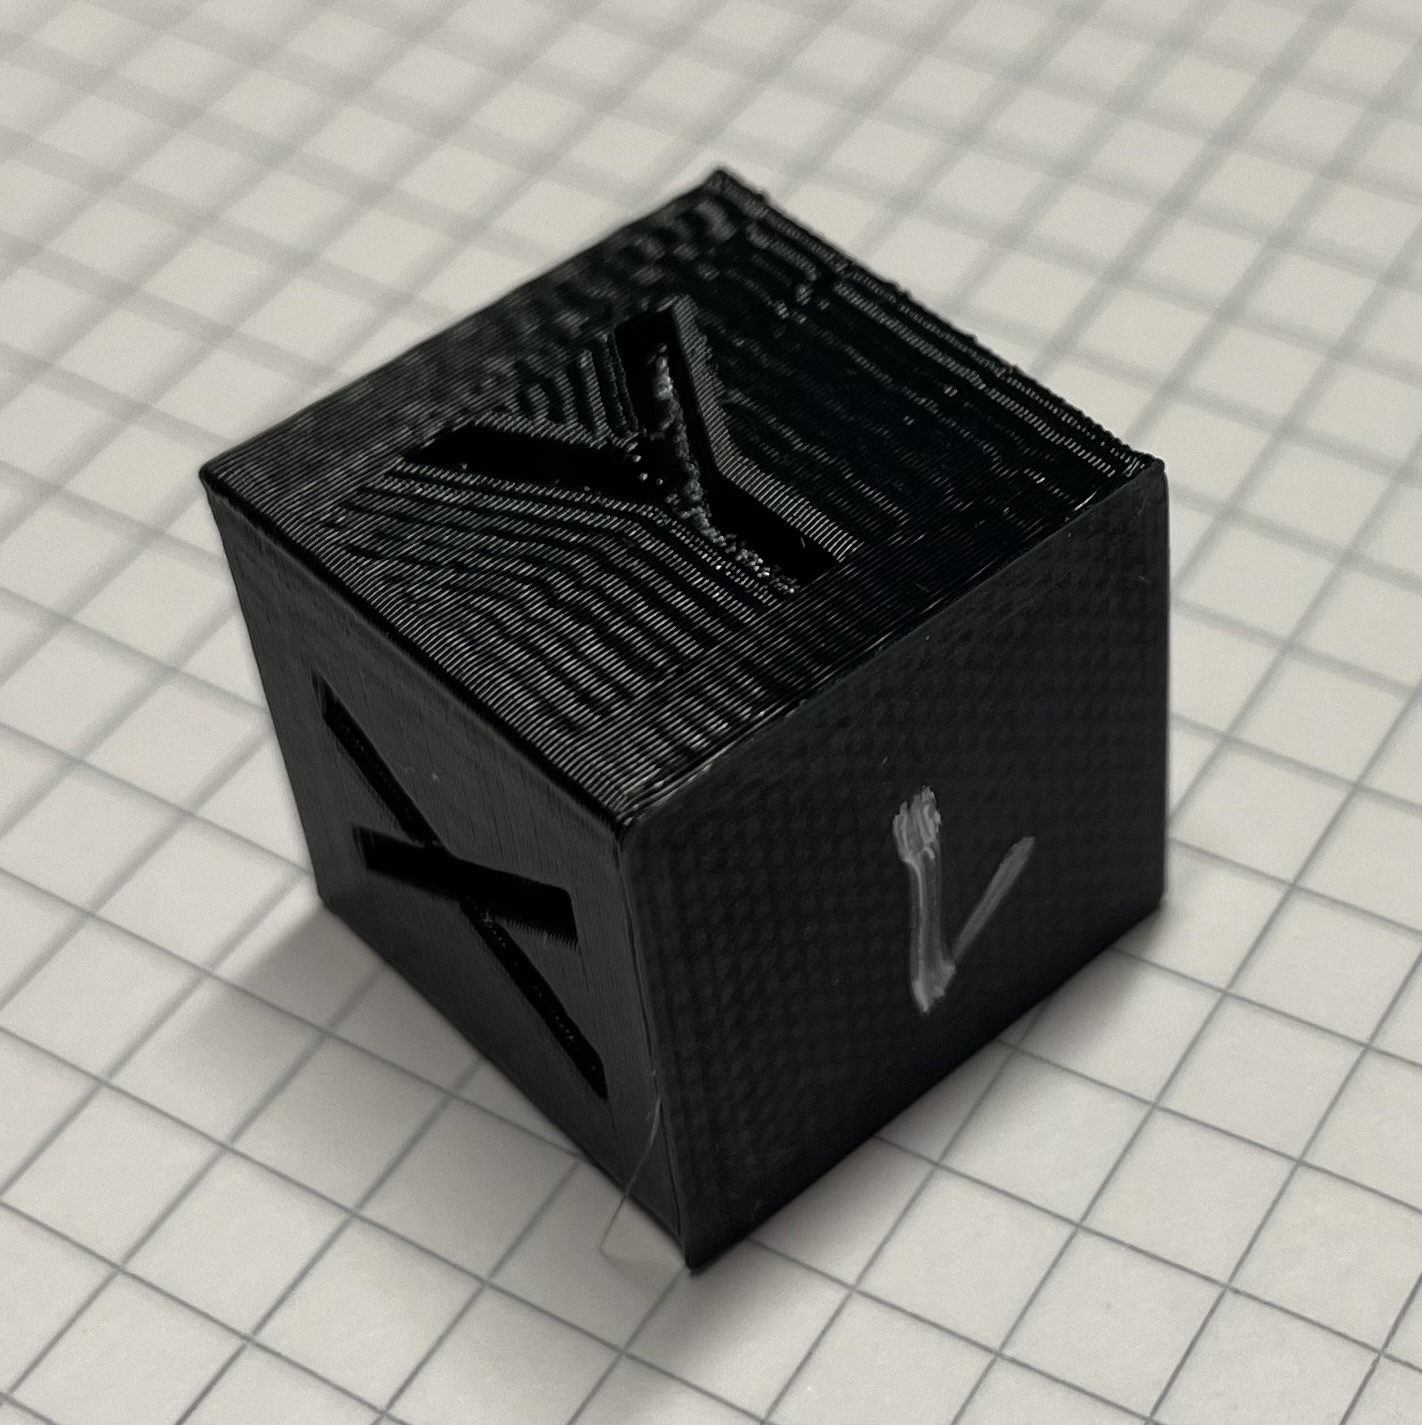
First result with stock settings
2. No «TL Smoothers»
I have used the same settings and STL file, Just diconnected the smoothers.
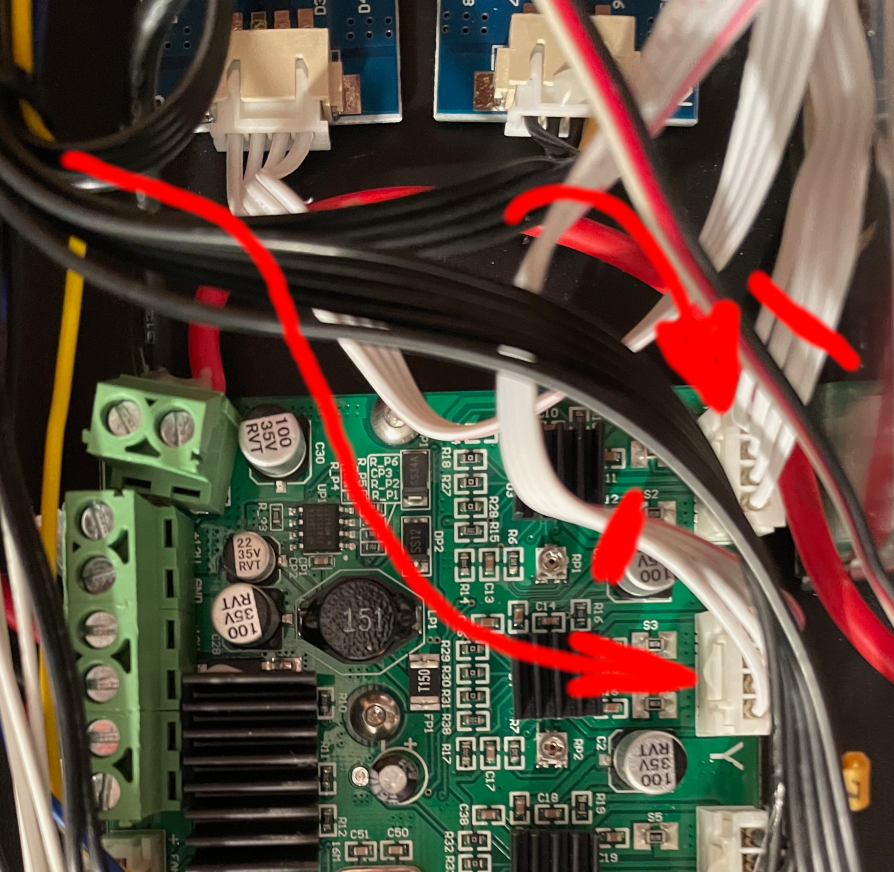
Disconnected the TL Smoothers and reconnected the motors directly to stepper drivers
The result looks exactly the same. even the wrinkle right of the upper part of the Y is the same. So no changes but the Smoothers also did not help. So they stay removed.
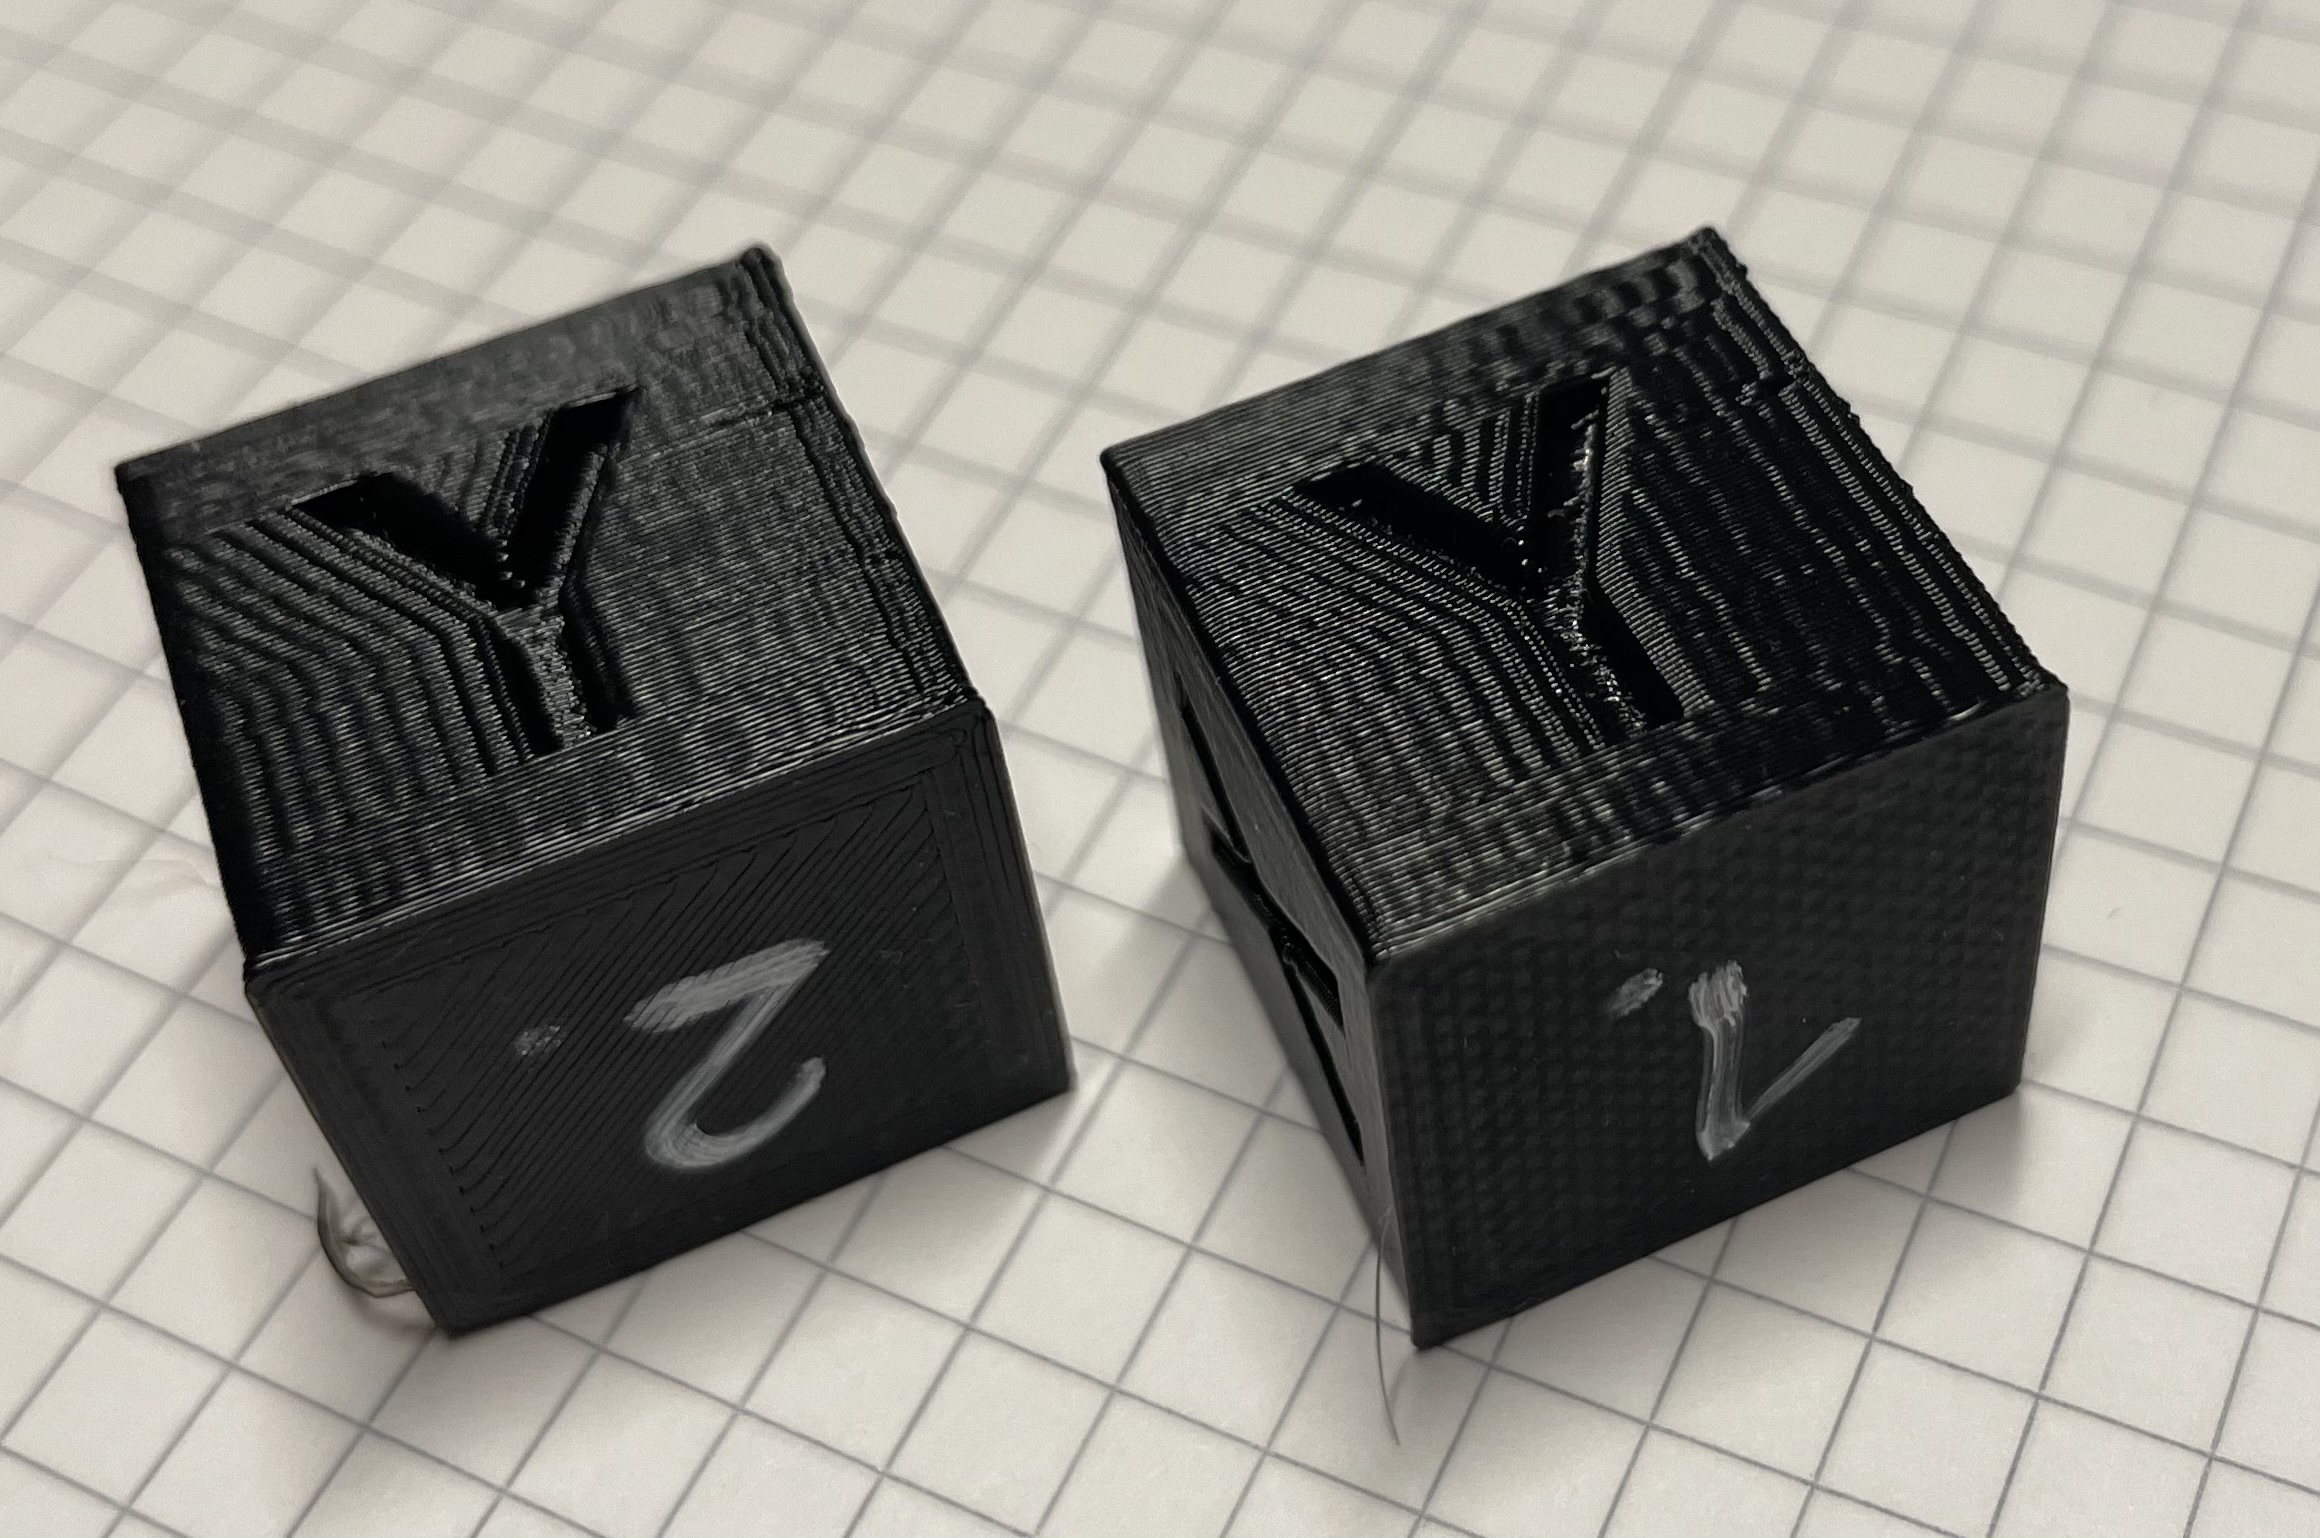
Comparison of print 2 (left) and print 1 (right)
3. floor it
To minimize oscillations from the shelf the printer is placed on, I put the printer on the floor for the next test run. Same settings, same STL and same GCODE as in the last 2 runs.
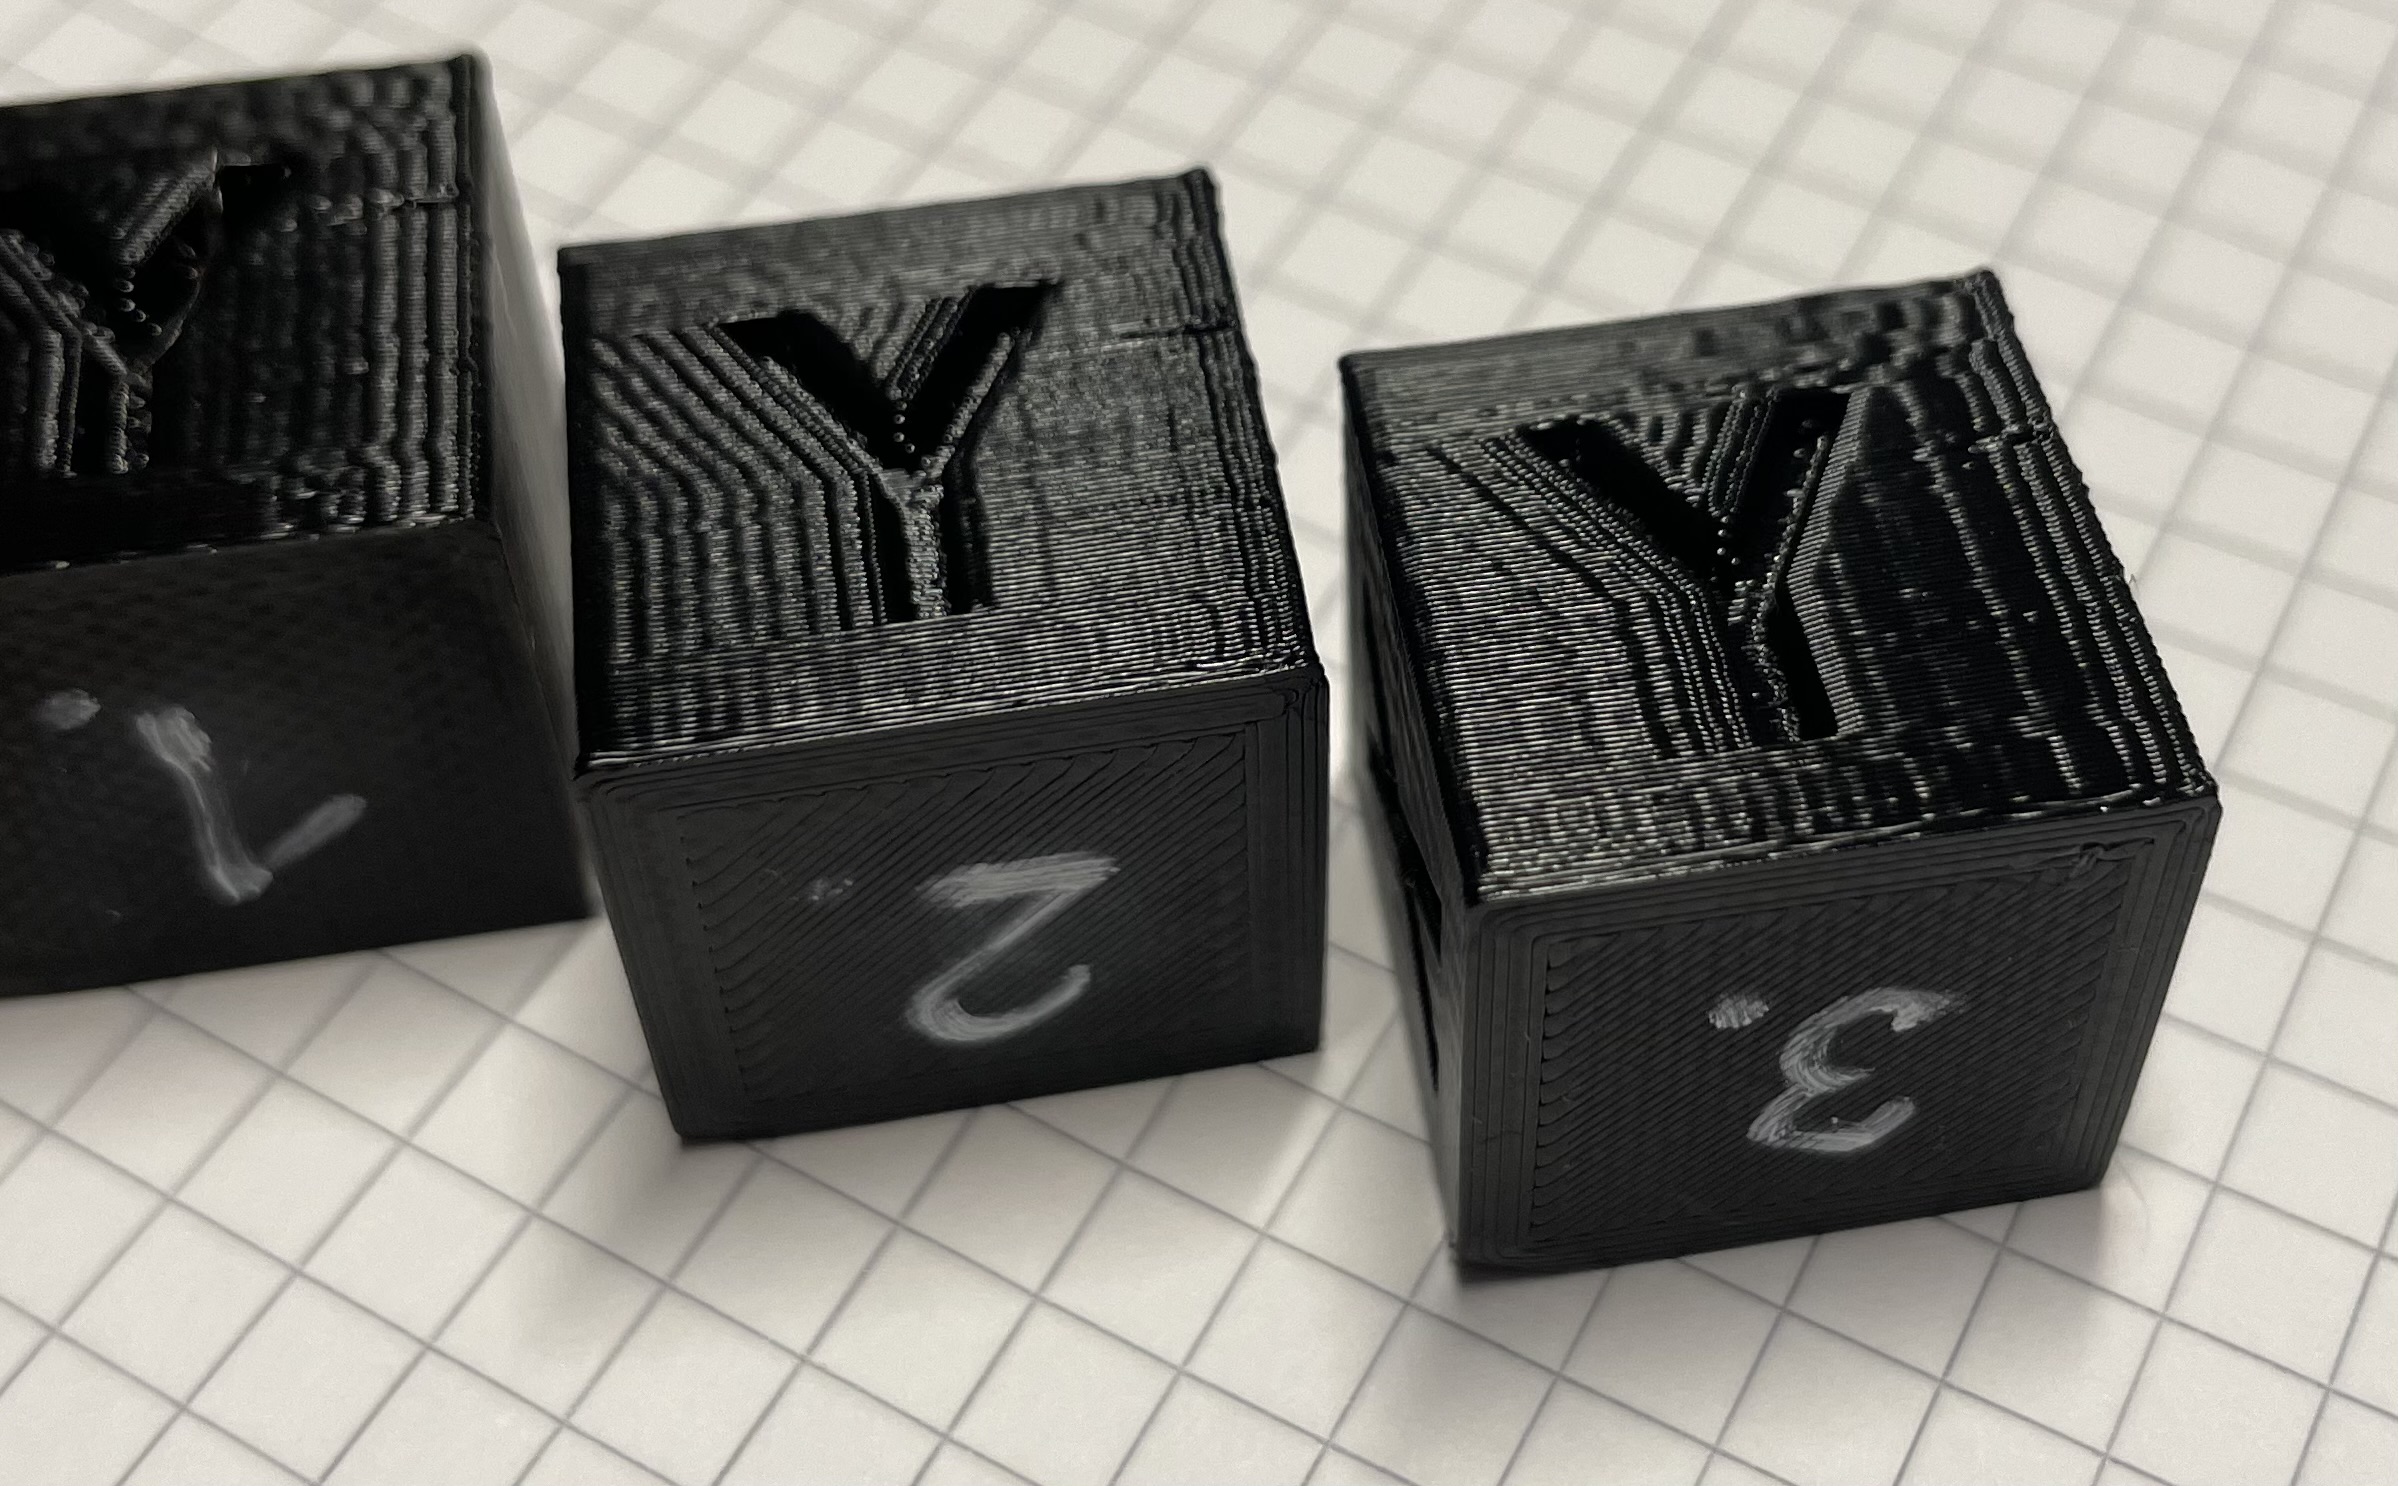
Comparison of print 2 (left) and print 3 (right)
Not much of a difference, but there is a difference. So we now know that the ringing is partially due to the Movement of the shelf but mostly due to the lack of tuning or the frame flexing.
Analyze Ringing
So the ringing must go. There is a nice test file for Klipper to analyze the ringing frequency. Detailed instructions how to use it can be found in the official Klipper Documentation under Resonance compensation. Long story short, I printed the test G-Code with the follwoing Settings:
Base Extruder Settings
 1[general]
 2version = 4
 3name = PLA Klipper Ender5 -- Standard 0.2
 4definition = creality_base
 5
 6[metadata]
 7type = quality_changes
 8quality_type = standard
 9intent_category = default
10position = 0
11setting_version = 22
12
13[values]
14infill_sparse_density = 0
15material_print_temperature = 185.0
16speed_print = 250.0
Ender 5 Settings (PLA)
 1[general]
 2version = 4
 3name = PLA Klipper Ender5 -- Standard 0.2
 4definition = creality_base
 5
 6[metadata]
 7type = quality_changes
 8quality_type = standard
 9setting_version = 22
10
11[values]
12klipper_accel_limit = 8000
13klipper_accel_to_decel_limit = 1500
14klipper_corner_velocity_limit = 5
15klipper_velocity_limit = 300
16klipper_velocity_limits_enable = True
17material_bed_temperature = 60
Settings
SET_VELOCITY_LIMIT ACCEL_TO_DECEL=7000SET_PRESSURE_ADVANCE ADVANCE=0: pressure_advance: 0.000000 pressure_advance_smooth_time: 0.040000SET_INPUT_SHAPER SHAPER_FREQ_X=0 SHAPER_FREQ_Y=0: Unknown command:“SET_INPUT_SHAPER”TUNING_TOWER COMMAND=SET_VELOCITY_LIMIT PARAMETER=ACCEL START=1500 STEP_DELTA=500 STEP_HEIGHT=5: Starting tuning test (start=1500.000000 step_delta=500.000000 step_height=5.000000)
Now go print the test model sliced with the suggested parameters.
The following G-Code resulted form the above settings: CE5_ringing_tower.gcode and the result looks something like this:
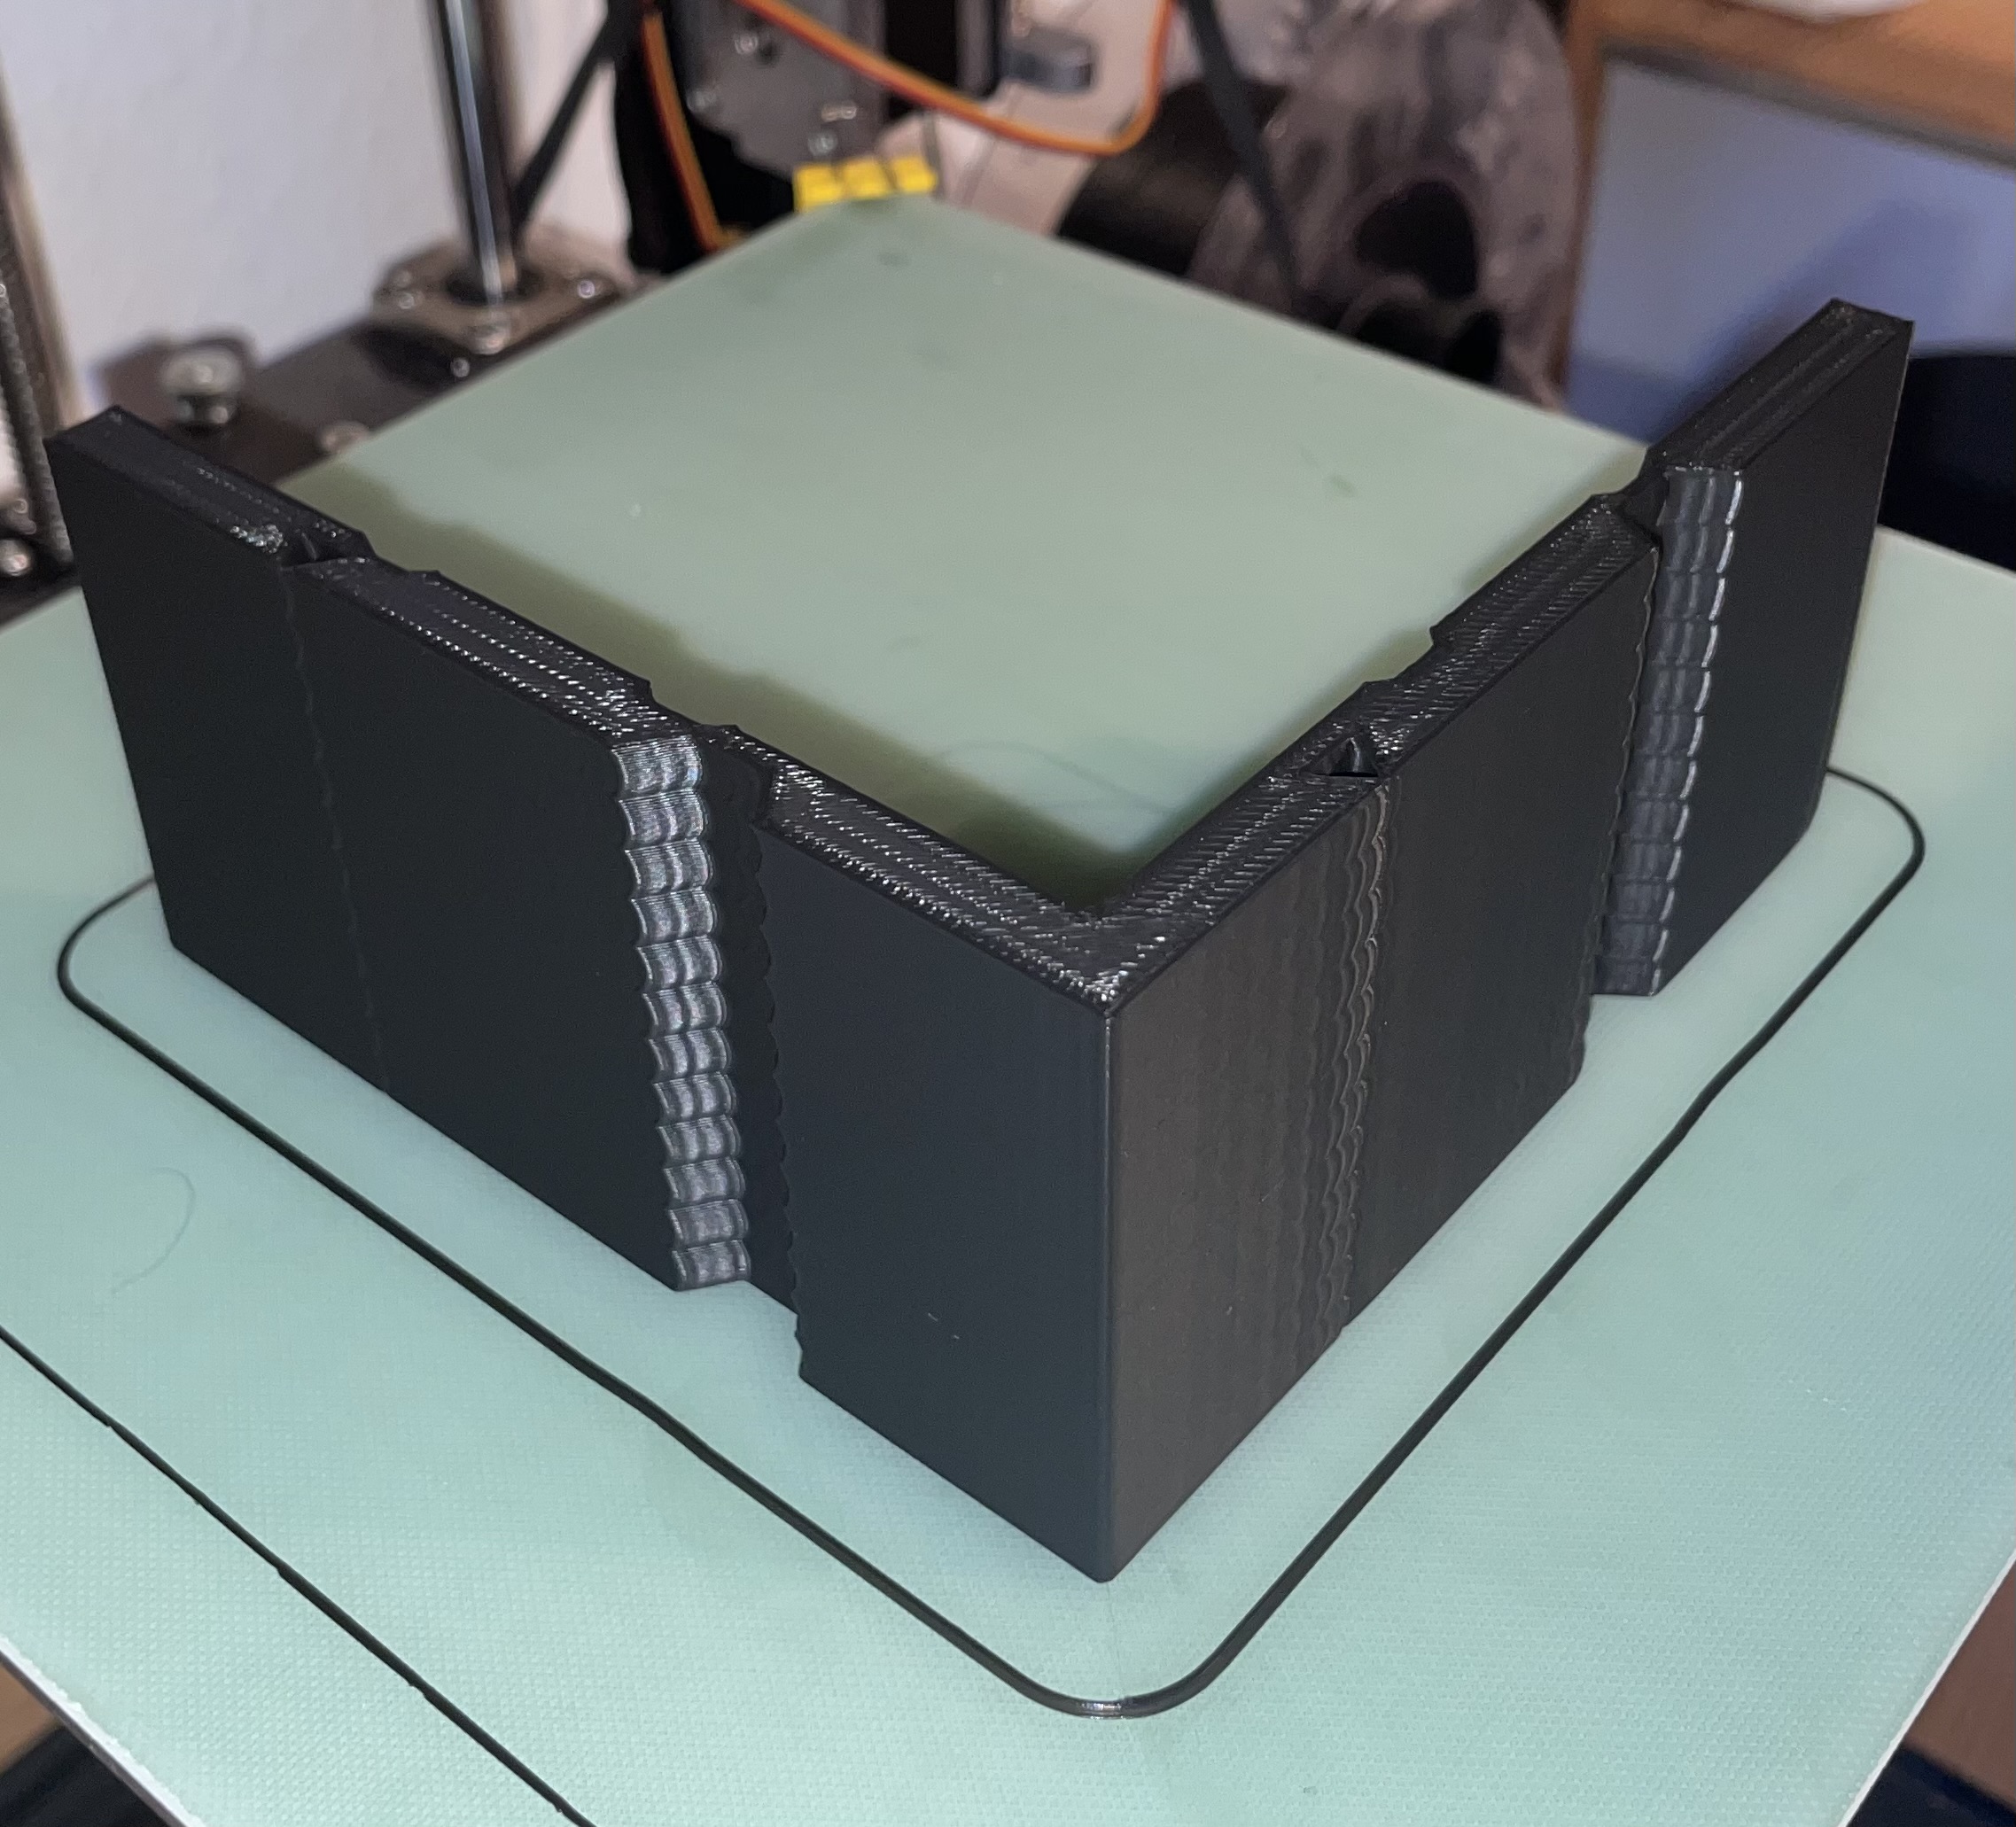
First run of the ringing tower with stock settings.
Measure X Axis
Following the instructions in the documentation, these adjustments have been made:
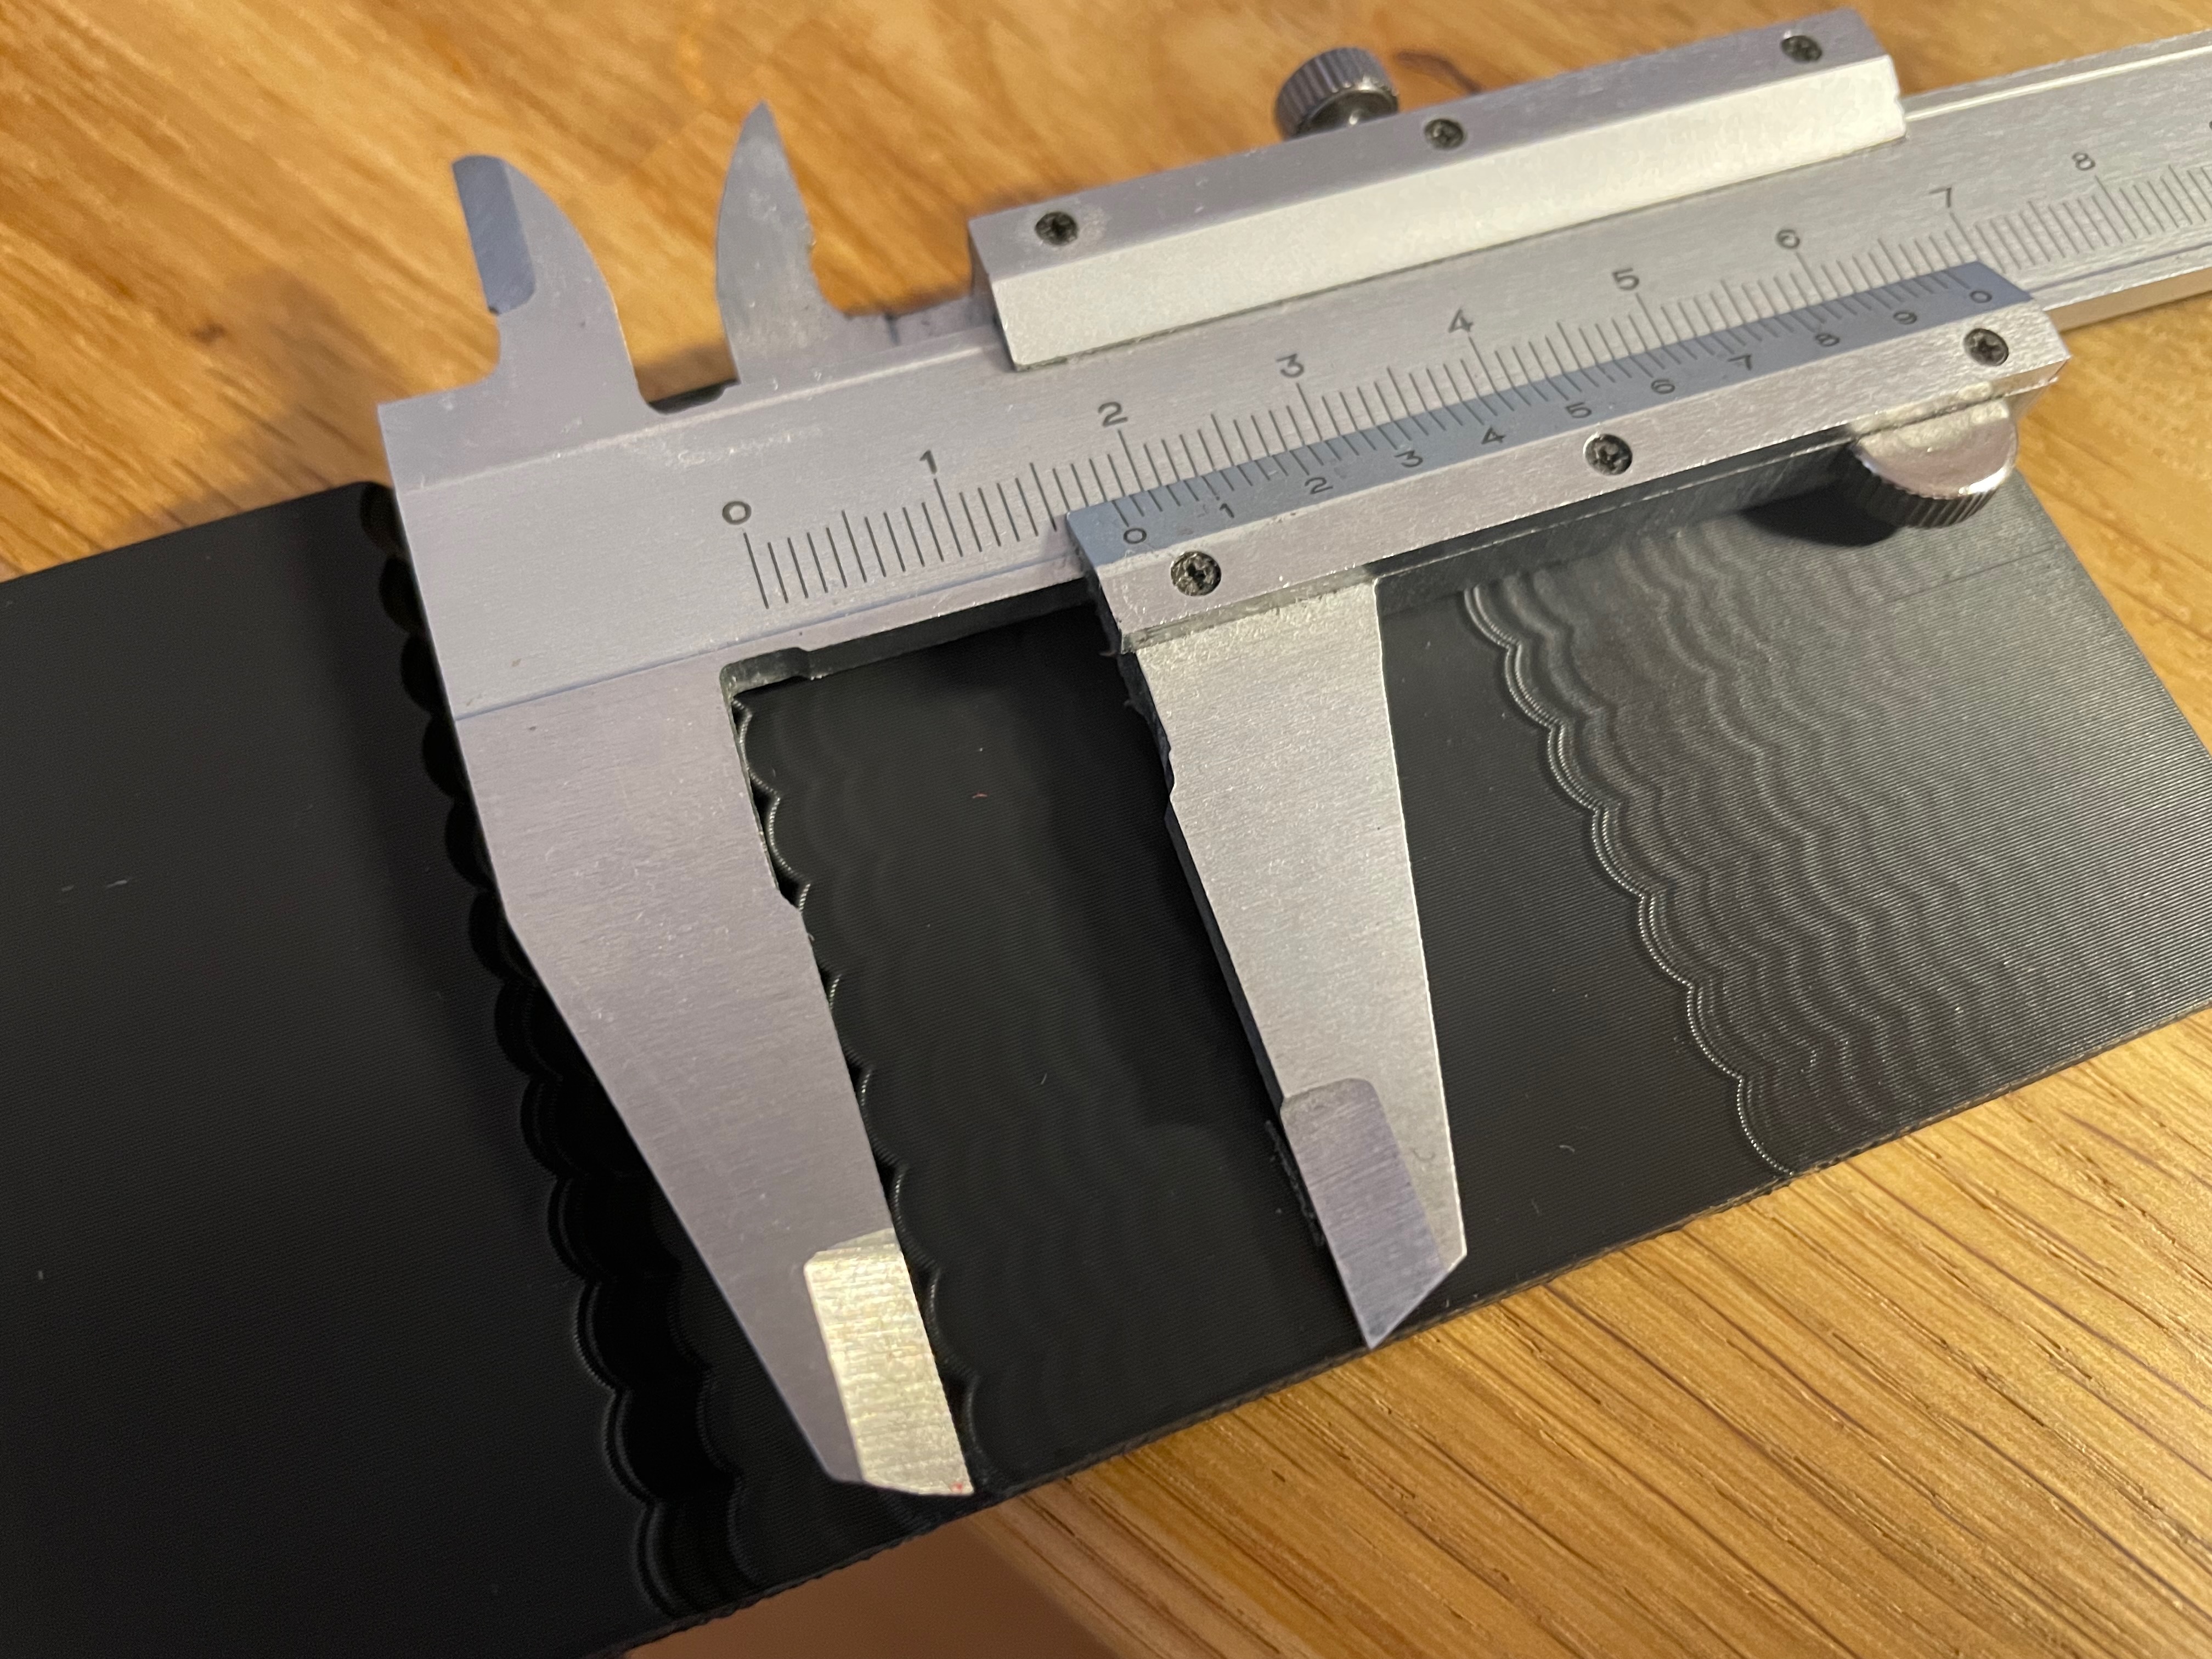
Measuring X-Axis oscillations
8 Osscilations in 18.1 mm
- N: Number of oscillations
- D: Distance measured in mm
- F: Frequency in Hz
Corrections:
- X-Axis:
100 * N / D ≈ F/100 * 8 / 18.1 ≈ 44.19 - Y-Axis:
100 * N / D ≈ F/100 * 8 / 16.4 ≈ 48.78
Save config
Add a section [input_shapre] in printer.cfg.
1[input_shaper]
2shaper_freq_x: 44.19  # frequency for the X mark of the test model
3shaper_freq_y: 48.78  # frequency for the Y mark of the test model
Restart the server to make the change permanent and loaded: SAVE_CONFIG and RESTART.
Verify
Print it again.
Still some miniscule ringing.
Changing shaper config to:
1# Resonance Compensation, must be calibrated per printer
2[input_shaper]
3shaper_freq_x: 44.19  # frequency for the X mark of the test model
4shaper_freq_y: 40     # 2nd: 44, 1st try: 48.78  # frequency for the Y mark of the test model
Retry.
Pressurae Adnvance
SET_VELOCITY_LIMIT SQUARE_CORNER_VELOCITY=1 ACCEL=500TUNING_TOWER COMMAND=SET_PRESSURE_ADVANCE PARAMETER=ADVANCE START=0 FACTOR=.010
The pressure_advance value can then be calculated as pressure_advance = <start> + <measured_height_mm> * <factor>. (For example, 0 + 14.0 * 0.020 would be 0.28).
and print square_tower.stl.
The corners at 14mm look a bit less round then the ones higher up. so I chose this bit to tune the pressure advance.
I could not observe any significant change in corner quality. Also, there is still a fair amount of ringing. Also, the klipper manual really does not explain what should be looked at when examining these pressure towers.
This was a lot of work just to find out, that I do not have to do this when I would be using an accelerometer.
So, it was a nice experiment and I have just ordered an ADXL-345.